In short
- Do not aim straight at home. A planet is always placed near that line, and the stardust lies on a curved route.
- Medium power beats full power. A slower comet bends more, and bending is how you get home.
- The three stardust specks sit along a real landing path. Thread the nearest one first.
- Change one thing at a time, by a tiny amount, and compare with the faint line your last shot left behind.
The basics
Your comet waits on a launch pad at the bottom of the sky. Home is the blue planet with a little house on top; touch any part of it to land, collecting the three golden stardust specks on the way.
A flight can end four other ways: you crash into a planet or a moon, you are swallowed by a black hole, you are lost in space by flying off the edge, or you are left drifting when the comet is still out there after 14 seconds. Then the comet returns to the pad and you try again. Shots are unlimited.
Aiming the slingshot
Press anywhere on the sky, not just on the comet, and drag away from where you want to go. The longer the drag, the faster the launch. Full power comes at a drag of about a fifth of the sky's width; dragging further adds nothing. A very short drag is ignored, so you can let go near where you started to cancel.
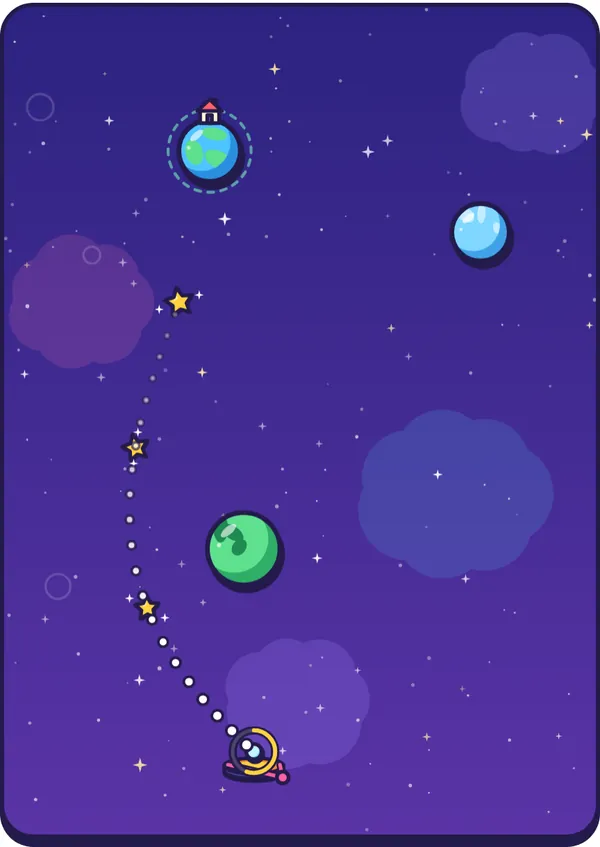
While you drag, the ring around the pad shows power (green, then yellow, then red near the top), and a dotted line shows the start of the comet's real path, gravity included. The dotted line gets shorter as you climb the levels: about 1.4 seconds of flight on the first levels, 0.9 from level 4, 0.5 from level 9 and just 0.3 from level 15.
Keyboard players: the left and right arrows turn the aim, up and down change the power, and Space or Enter launches.
What pulls the comet
Every body pulls the comet towards it, more strongly the closer it gets. The pull depends only on where the comet is, not how fast it is going.
| Planets | Bigger planets pull harder: twice as wide means four times the pull. Touching one is a crash. |
|---|---|
| Home | Pulls gently too, so a shot that passes close tends to curl in and land. |
| Moons | Circle a planet, but the clock restarts at every launch and the moon is drawn where it will be when you let go, so the same shot always meets it in the same place. |
| Rings | The glowing hoop around a ringed planet is a bumper. The comet bounces off it, losing a tenth of its speed. The planet inside is still solid. |
| Black holes | Pull about as hard as the biggest planets, but the deadly centre is tiny. Fall in and you are swallowed. Pass beside it and it whips you round. |
Stardust and stars
Your stars for a landing are simply the stardust you collected on that flight: one, two or three. Specks from a failed flight do not carry over. Any landing clears the level and unlocks the next, and the game remembers your best stars for each level.
The stardust is not scattered at random. Every sky is tested before you see it: the level maker fires a fan of test shots, keeps the sky only if a few of them land, then places the three specks along one of those landing paths. So three stars is always possible, and the specks trace a real route home. In every sky we checked, the speck nearest the pad was the first one on that route.
Aiming techniques that work
We checked each of these with hundreds of thousands of test shots through the game's own flight code.
1. Do not aim straight at home
The first planet is always placed near the straight line from the pad to home, and from level 4 the maker throws away any sky where a medium-power shot straight at home lands. At other powers a straight shot sometimes curls in, but it rarely collects the stardust: across 60 test skies it earned three stars on only three, and none of those was on level 9 or above.
2. Use medium power
On every level band, full-power shots landed less often than medium ones, and the game's own hint shot is never a full-power shot. Because the pull depends on position, a slow comet spends longer near each planet and bends more, while a fast one barely curves and sails off the edge. Launches between a third and three quarters of full power gave 60 percent of all our test landings.
3. Thread the nearest speck
Because the specks sit on a real landing path, the first one is a free signpost. Line the dotted aim up so it runs through the nearest speck, then try different power. Among our test shots, simply passing through that first speck roughly doubled the chance of landing, and shots that took the first two specks in order went on to collect all three about one time in five. On early levels the dotted line usually reaches it.
4. Make small changes, one at a time
After every shot, your last path stays on the sky as a faint dashed line. Change only one thing. If the path curved too much, add a little power; if it did not curve enough, take some away. If the curve was right but in the wrong place, turn the aim slightly.
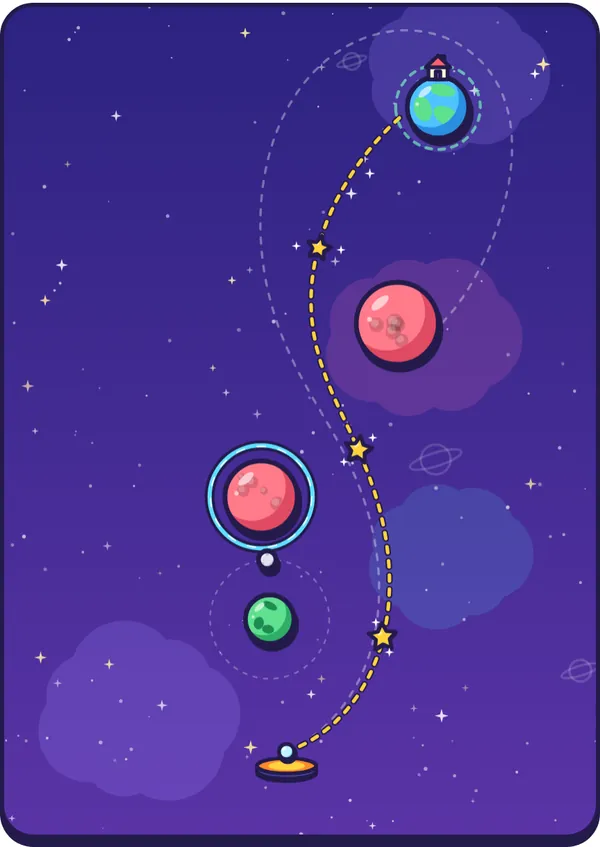
The changes really must be small. Around the three-star shot on the early levels, the range of directions that still gave three stars was about three degrees wide, and the range of power about five percent. On the hardest levels it shrinks to about a degree and a half of direction and one percent of power, which is less than a pixel of drag on most screens. So drag slowly, expect three stars on the top levels to take many tries, and remember that a plain landing still clears the level. On later levels, power is the touchier of the two.
5. Use rings and black holes, do not fear them
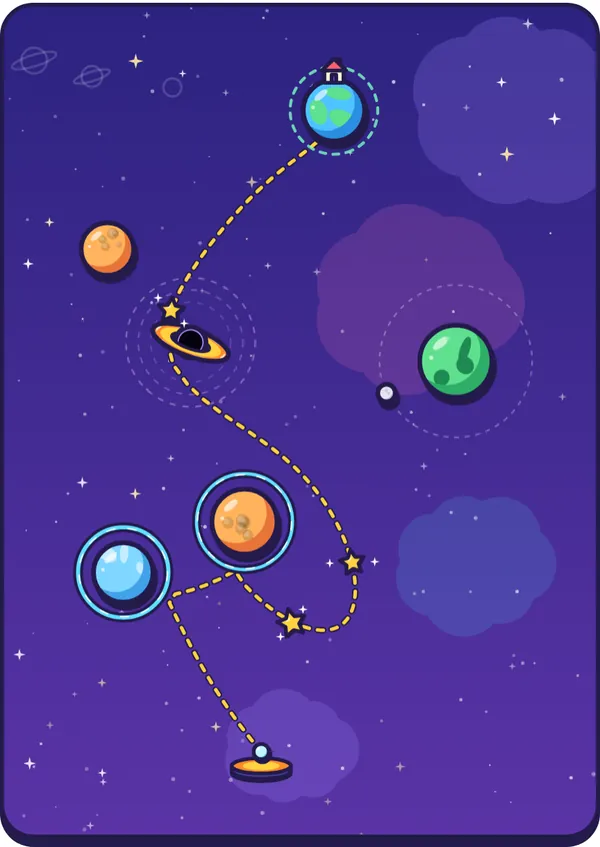
A ring is a free change of direction. On skies with a ring, about one test landing in four used a bounce. Black holes are dangerous only at the centre: winning paths often pass close by, and some of our test landings skimmed right past the edge. On later levels, as in the picture below, the route home may need both.
Hints and the speed button
You get two hints per sky. A hint draws the level maker's own three-star route in gold for about three seconds, and sets the keyboard aim to that exact shot: press Space straight away and it flies. That is a guaranteed three stars, so save hints for skies that have truly beaten you.
The ⏩ 2× button plays flights at double speed. Tapping the sky while the comet is flying also switches it on. It never changes where the comet goes.
Levels, the daily sky and bonus cards
| Levels 1–3 | One or two planets. Nothing else, and the longest aiming line. |
|---|---|
| Levels 4–8 | Two or three planets, with a moon and ringed planets on some skies. |
| Levels 9–14 | Two or three planets plus a black hole; moons and rings are more common. |
| Level 15 on | Three or four planets, a black hole, usually a moon and often rings, with the shortest aiming line. |
The daily sky is a level 4 to 8 style sky that is the same for everyone that day, with its own streak. After a landing on the levels, you turn over one of three bonus cards for your next level: an extra hint or two, or a telescope that lengthens the aiming line by half a second of flight.
Ready to try it? It's free and runs in your browser.
Play Orbit